Vinyl Wrap Kitchen Cabinets: A Transformation Unveiled
Kitchen renovations often present a significant undertaking, demanding considerable time, financial investment, and disruption to daily routines. Cabinet refacing offers a less invasive alternative to complete replacement, and within refacing options, vinyl wrapping emerges as a budget-friendly and visually impactful choice. This article will explore the process of vinyl wrapping kitchen cabinets, showcasing the dramatic "before and after" transformations achievable through this technique. The objective is to provide a comprehensive understanding of vinyl wrapping for kitchen cabinets, exploring its advantages, limitations, and the key steps involved in achieving a professional finish.
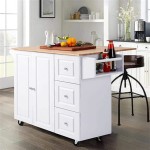
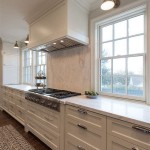
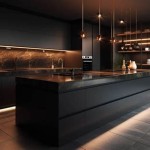
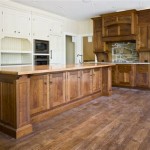
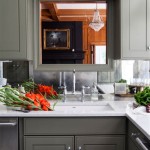
Vinyl wrapping involves applying a self-adhesive vinyl film to the existing cabinet surfaces. This film can mimic the appearance of various materials, including wood grain, solid colors, metallic finishes, and even textured surfaces. The versatility of vinyl allows homeowners to drastically alter the look of their kitchen without the expense and hassle of completely replacing their cabinets. The "before and after" images often highlight the stark contrast between outdated or worn cabinets and the fresh, modern appearance achieved through vinyl wrapping. Furthermore, compared to painting, vinyl wrapping provides a more durable and easily cleanable surface, resistant to scratches and moisture.
Understanding the Benefits of Vinyl Wrapping
Vinyl wrapping kitchen cabinets offers a multitude of benefits that make it a compelling choice for homeowners seeking an affordable and efficient kitchen upgrade. Several key advantages contribute to its growing popularity.
The first and foremost benefit is
cost-effectiveness
. Compared to replacing kitchen cabinets, vinyl wrapping represents a fraction of the expense. The cost of new cabinets can easily run into thousands of dollars, encompassing material costs, installation fees, and potential plumbing or electrical adjustments. Vinyl wrapping, on the other hand, primarily involves the cost of the vinyl film, adhesive primer (if required), and labor if professional installation is preferred. For budget-conscious homeowners, this can translate into substantial savings.Secondly,
minimal disruption
is a significant advantage. Traditional kitchen renovations can disrupt daily routines for weeks, even months. Cabinet replacement involves demolition, construction, and potential delays. Vinyl wrapping, however, is a relatively quick and clean process. It can often be completed within a few days, minimizing inconvenience to the household. The existing cabinet boxes remain in place, eliminating the need for extensive demolition or structural modifications. Therefore, the kitchen remains functional throughout most of the wrapping process.Finally,
versatility in design
is a noteworthy benefit. Vinyl films are available in a vast array of colors, patterns, and textures. Homeowners can choose from realistic wood grains, sleek solid colors, contemporary metallic finishes, and even custom-printed designs. This allows for complete customization of the kitchen's aesthetic. The flexibility of vinyl also extends to replicating the look of more expensive materials, such as high-gloss lacquer or exotic wood veneers, at a significantly lower cost. The "before and after" photos often showcase this design versatility, demonstrating how vinyl can transform a dated kitchen into a modern and stylish space.Disadvantages and Considerations
While vinyl wrapping offers numerous advantages, it's crucial to acknowledge its limitations and consider certain factors before proceeding with the project. Understanding these drawbacks ensures realistic expectations and informed decision-making.
One primary limitation is the
substrate condition
. Vinyl wrapping relies on a smooth and stable substrate for proper adhesion and a flawless finish. If the existing cabinets are damaged, warped, or have peeling laminate, the vinyl will not adhere properly. Addressing these issues prior to wrapping is essential. This may involve filling holes, sanding rough surfaces, and applying a primer to promote adhesion. Failure to prepare the substrate adequately can result in bubbling, peeling, and an unsatisfactory final appearance. Thorough inspection and preparation are paramount for achieving a professional and long-lasting result.Another consideration is the
quality of the vinyl film
. Not all vinyl films are created equal. Lower-quality films may be thin, prone to tearing, and lack UV resistance, leading to fading and discoloration over time. Investing in high-quality, durable vinyl specifically designed for cabinet wrapping is crucial. These films typically have a thicker adhesive layer, better scratch resistance, and UV protection, ensuring a longer lifespan and a more aesthetically pleasing finish. Researching different vinyl brands and reading reviews can help in selecting a reputable and reliable product.Finally,
DIY application challenges
should be acknowledged. While vinyl wrapping can be a DIY project, it requires patience, skill, and attention to detail. Achieving a seamless and professional finish can be challenging, especially for beginners. Air bubbles, wrinkles, and misalignment are common pitfalls. Professional installers possess the experience and tools to ensure a flawless application. If opting for DIY, practicing on a small, inconspicuous area first is recommended to develop the necessary skills and techniques. Proper tools, such as a heat gun, squeegee, and trimming knife, are essential for successful application.The Vinyl Wrapping Process: A Step-by-Step Guide
Understanding the vinyl wrapping process is essential for both DIY enthusiasts and those considering hiring professionals. The following steps outline the key stages involved in achieving a successful transformation.
The initial step involves
cabinet preparation
. This includes thorough cleaning and degreasing of the cabinet surfaces to remove any dirt, grime, or grease. A mild detergent and water solution is typically sufficient. Next, any damaged or uneven surfaces must be addressed. Fill holes with wood filler, sand rough spots, and ensure a smooth and even substrate. Loose laminate or peeling paint should be carefully removed. Finally, applying a primer specifically designed for vinyl adhesion is often recommended, particularly on surfaces that are not inherently smooth or porous. The primer creates a strong bond between the cabinet surface and the vinyl film, preventing peeling and ensuring a long-lasting finish.The second step is
measuring and cutting the vinyl
. Accurate measurements are crucial to minimize waste and ensure a proper fit. Measure each cabinet door, drawer front, and exposed cabinet panel individually. Add a few extra inches to each dimension to allow for trimming and adjustments. Using a sharp cutting knife and a ruler, carefully cut the vinyl film according to the measured dimensions. Precise cuts are essential for achieving a clean and professional look. Consider using a cutting mat to protect the work surface and ensure accurate cuts.The third step involves
applying the vinyl film
. Start by peeling back a small portion of the backing paper from the vinyl film, exposing the adhesive side. Align the vinyl with the edge of the cabinet surface and gently press it into place. Use a squeegee to smooth out the vinyl and remove any air bubbles. Work from the center outwards, applying even pressure to ensure proper adhesion. As you progress, gradually peel back more of the backing paper and continue smoothing the vinyl. A heat gun can be used to soften the vinyl and make it more pliable, particularly around curves and edges. Be careful not to overheat the vinyl, as this can damage it. If air bubbles persist, use a pin to prick them and gently smooth the vinyl over the hole.The final step is
trimming and finishing
. Once the vinyl is fully applied, use a sharp trimming knife to carefully trim away any excess vinyl around the edges of the cabinet. Pay close attention to detail and ensure clean, straight cuts. Use a seam roller to press down the edges of the vinyl and ensure a secure bond. Inspect the finished surface for any imperfections, such as air bubbles or wrinkles. If necessary, use a heat gun and squeegee to correct any minor flaws. Finally, reattach any hardware, such as knobs and handles, to complete the transformation. A thorough cleaning of the newly wrapped cabinets will ensure a pristine and professional final appearance.
Vinyl Wrapping Kitchens North West

Vinyl Wrapping Kitchens North West

Kitchen Vinyl Wrap Worktop Wrapping

How To Wrap Your Kitchen In Vinyl Home

Before After Kitchen Wrap Dubai

How To Vinyl Wrap Kitchen Cabinet Doors Budget Makeover Youtube

Vinyl Wrapping Kitchens Doors Windows Wardrobes

Kitchen Spraying Over Vinyl Wrapped Kitchens Wespray

Totally Transformed Vinyl Wrapped Kitchen Diy Remodel Design Showrooms Wrap

How To Vinyl Wrap Kitchen Cabinets Worktop Budget Transformation Youtube