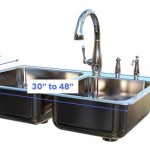
How To Change The Kitchen Faucet
The kitchen faucet is one of the most important fixtures in your home. It's used for everything from washing dishes to filling up your pet's water bowl. But what happens when your kitchen faucet starts to leak or malfunction? Don't worry, replacing a kitchen faucet is a relatively easy DIY project that can be completed in a few hours.
Here's a step-by-step guide on how to change the kitchen faucet:
Step 1: Gather your tools and materials.
You will need the following tools and materials to replace your kitchen faucet:
- New kitchen faucet
- Adjustable wrench
- Plumber's putty
- Teflon tape
- Bucket
- Rags
Step 2: Turn off the water supply.
Before you start working on your kitchen faucet, you need to turn off the water supply. This will prevent water from spraying everywhere when you disconnect the old faucet.
To turn off the water supply, locate the shut-off valves under the sink. They are usually located near the base of the faucet, but they may be located elsewhere depending on your plumbing system.
Once you have found the shut-off valves, turn them clockwise to turn off the water supply.
Step 3: Disconnect the old faucet.
Once the water supply is turned off, you can disconnect the old faucet. To do this, use an adjustable wrench to loosen the nuts that are holding the faucet in place.
Once the nuts are loose, you can pull the old faucet out of the sink.
Step 4: Apply plumber's putty to the new faucet.
Before you install the new faucet, you need to apply plumber's putty to the base of the faucet.
To do this, roll out a small piece of plumber's putty and form it into a ring. Place the ring of plumber's putty around the base of the faucet, making sure to cover the entire surface.
Step 5: Install the new faucet.
Once you have applied plumber's putty to the new faucet, you can install it in the sink.
To do this, insert the new faucet into the hole in the sink and tighten the nuts that are holding it in place.
Step 6: Connect the water lines.
Once the new faucet is installed, you need to connect the water lines.
To do this, locate the water lines under the sink and connect them to the corresponding ports on the new faucet.
Make sure to use Teflon tape on the threads of the water lines to prevent leaks.
Step 7: Turn on the water supply.
Once the water lines are connected, you can turn on the water supply.
To do this, turn the shut-off valves under the sink counterclockwise to turn on the water supply.
Step 8: Check for leaks.
Once the water supply is turned on, check for leaks.
If you see any leaks, tighten the nuts that are holding the faucet in place or the water lines.
Congratulations! You have now successfully replaced your kitchen faucet.

How To Replace A Kitchen Sink Faucet

How To Replace A Kitchen Faucet

How To Replace A Kitchen Faucet Youtube

How To Change A Kitchen Faucet Family Handyman

How To Replace A Kitchen Faucet For Newbies Anika S Diy Life

How To Replace A Kitchen Faucet Green House Plumbing

How To Replace A Kitchen Faucet Beginner S Guide The Handyman Daughter

Replacing Cheap A Faucet

How To Replace A Kitchen Faucet Young House Love

How To Install A Kitchen Faucet Step By Instructions


