How to Replace a Kitchen Faucet
Replacing a kitchen faucet is a common plumbing task that homeowners can often accomplish themselves, saving on professional service costs. The process involves several steps, from preparing the workspace to installing the new fixture. A methodical approach, proper tools, and attention to detail are crucial for a successful installation.Before commencing the replacement, it is essential to gather the necessary materials and tools. This preventative step avoids interruptions mid-project. The new faucet, naturally, is the primary element. Additionally, adjustable wrenches (typically two), a basin wrench (also known as a faucet wrench), plumber's putty or silicone sealant, a screwdriver (both Phillips head and flathead), penetrating oil (if dealing with older plumbing), a bucket, towels or rags, safety glasses, and possibly a work light are all recommended.
Safety is paramount. Before any work begins under the sink, ensuring the water supply is completely shut off is vital. Locate the shut-off valves for both the hot and cold water lines. These are typically located directly under the sink. Turn both valves clockwise until they are fully closed. To verify the water is off, turn on the existing faucet. Any residual water remaining in the pipes will drain out. Place a bucket beneath the connections to catch any remaining water. If the shut-off valves are corroded or inoperable, the water supply to the entire house may need to be shut off from the main valve, typically located near the water meter or well.
The next phase involves disconnecting the old faucet. This often proves to be the most challenging part of the process, particularly with older installations where corrosion and mineral buildup can seize connections. The basin wrench proves invaluable here. This tool is designed to reach and loosen the nuts that secure the faucet to the underside of the sink. Its pivoting jaw allows access in tight spaces. Spraying penetrating oil onto the connections a few hours before attempting removal can ease the process considerably. Patience is crucial; avoid applying excessive force that could damage the existing plumbing.
Once the nuts securing the faucet are loosened, carefully disconnect the water supply lines. These lines are typically connected with compression fittings. Use two wrenches to disconnect them – one to hold the faucet connection steady and the other to loosen the nut on the supply line. Inspect the supply lines for wear and tear. Replacing them with new stainless steel braided supply lines is a good practice, ensuring a leak-free connection for the new faucet. After disconnecting the water lines and the mounting nuts, the old faucet can be removed from the top of the sink.
With the old faucet removed, thoroughly clean the sink surface around the faucet mounting holes. Remove any old putty, sealant, or debris. This creates a clean surface for the new faucet to seat properly and form a watertight seal. Using a putty knife or scraper can be helpful in removing stubborn residue. Following up with a household cleaner will prepare the sink for the new installation.
The installation process for the new faucet generally mirrors the removal process in reverse, but with new washers and seals to provide a watertight connection. Consult the manufacturer's instructions that accompany the new faucet; these will provide specific guidance for the model being installed. Most faucets will require the application of plumber's putty or silicone sealant around the base of the faucet where it meets the sink. This prevents water from seeping through the mounting holes and causing leaks.
Carefully insert the faucet into the mounting holes, ensuring it is properly aligned. From underneath the sink, attach the mounting hardware – typically washers and nuts – that secure the faucet to the sink. Tighten the nuts gradually and evenly, alternating between each nut to ensure the faucet is seated evenly and does not rock. Avoid overtightening, as this can damage the faucet or the sink.
Connect the water supply lines to the new faucet. If new supply lines are being used, ensure they are the correct length and have the appropriate fittings. When tightening the connections, use two wrenches as before to prevent twisting or damaging the faucet. Again, avoid overtightening. Hand-tightening followed by a quarter-turn with a wrench is usually sufficient. Once the connections are made, carefully inspect them for leaks.
After connecting the faucet, remove the aerator (the screen at the tip of the faucet) and turn the water supply valves back on slowly. Allow water to run through the faucet for a few minutes to flush out any debris or sediment that may be in the lines. This prevents clogging of the aerator later. Check all connections for leaks. If any leaks are found, tighten the connections slightly. If the leaks persist, re-examine the connections to ensure they are properly aligned and that the washers and seals are in good condition.
Once the water has run for a few minutes and all connections have been checked for leaks, replace the aerator. The faucet is now installed and ready for use. Regularly check the connections for any signs of leaks in the days following the installation, and tighten them as needed.
Key Point 1: Preparation and Safety
Thorough preparation is crucial for a successful faucet replacement. Gathering all necessary tools and materials beforehand minimizes interruptions and ensures the job can be completed efficiently. Safety is paramount. Always shut off the water supply completely before commencing work to prevent flooding and potential water damage. Wearing safety glasses protects the eyes from debris and potential splashes. If dealing with older plumbing, be prepared for complications such as corroded connections and be patient in addressing them.
Key Point 2: Removal of the Old Faucet
The removal of the old faucet often presents the greatest challenge due to corrosion and mineral buildup. Employing a basin wrench and penetrating oil can significantly ease the process. Applying penetrating oil several hours prior to attempting removal allows it to seep into the corroded connections, loosening them. Patience is essential; avoid using excessive force, which can damage the plumbing and potentially lead to more complex repairs. Take the time to properly loosen the connections before attempting to disconnect the water supply lines.
Key Point 3: Installation of the New Faucet and Leak Testing
Installing the new faucet requires careful attention to detail and adherence to the manufacturer's instructions. Ensure that the faucet is properly aligned and seated correctly on the sink surface. Apply plumber's putty or silicone sealant to create a watertight seal. When tightening the connections, avoid overtightening, which can damage the faucet or the sink. After connecting the water supply lines, thoroughly check all connections for leaks. Address any leaks promptly by tightening the connections or re-examining the seals. Regular monitoring of the connections in the days following installation is recommended to identify and address any potential leaks early on.
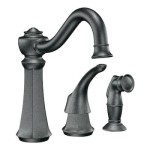
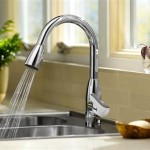
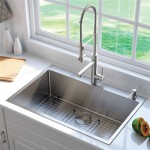
Choosing the right replacement faucet is also an important consideration. Faucets come in a variety of styles, finishes, and functionalities. Consider the existing décor of the kitchen, the size of the sink, and the desired features when selecting a new faucet. Some faucets include features such as pull-down sprayers, touchless operation, or water filtration systems. Research different options and choose a faucet that meets the specific needs and preferences.
Disposing of the old faucet responsibly is also a consideration. Many municipalities have recycling programs that accept plumbing fixtures. Contact the local waste management department for information on recycling options. Alternatively, the old faucet can be taken to a metal recycling center for disposal.
While replacing a kitchen faucet is often a manageable DIY project, there are situations where it is best to call a professional plumber. If the plumbing is severely corroded or if there are pre-existing plumbing issues, attempting the replacement yourself could exacerbate the problem. Additionally, if you are uncomfortable working with plumbing or if you encounter unexpected difficulties, it is best to seek professional assistance. A licensed plumber has the expertise and tools to handle complex plumbing issues and ensure that the faucet is installed correctly and safely.
Regular maintenance of the kitchen faucet can help to extend its lifespan and prevent problems. Clean the faucet regularly with a mild soap and water to remove dirt and grime. Avoid using abrasive cleaners, which can damage the finish. Check the faucet for leaks periodically and tighten the connections as needed. If the faucet develops a drip, repair it promptly to prevent water wastage. Replacing worn washers or O-rings can often resolve minor leaks.
In conclusion, replacing a kitchen faucet is a practical skill that homeowners can acquire to maintain their homes and save on repair costs. By following these guidelines, gathering the necessary tools and materials, and exercising caution, the task can be completed successfully. However, when faced with complex plumbing issues or if uncertain about any aspect of the process, seeking professional assistance is always recommended.

How To Replace A Kitchen Sink Faucet Youtube

How To Replace A Kitchen Faucet

How To Replace A Kitchen Faucet Youtube

How To Install A Kitchen Faucet Lowe S

How To Replace A Kitchen Faucet Green House Plumbing

How To Change A Kitchen Faucet Family Handyman

How To Replace A Kitchen Faucet For Newbies Anika S Diy Life

How To Replace A Kitchen Faucet Young House Love

How To Replace A Kitchen Faucet Beginner S Guide The Handyman Daughter

How To Install A Kitchen Faucet The Home