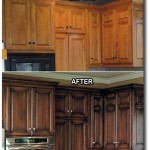
Gel Stain For Kitchen Cabinets
Gel stains are a popular choice for staining kitchen cabinets because they are easy to apply and provide a durable finish. Gel stains are made with a resin base, which gives them a thick, gel-like consistency. This consistency makes them easy to apply evenly, and it also helps to prevent the stain from running or dripping. Gel stains are also more durable than traditional oil-based stains, making them a good choice for high-traffic areas like kitchens.
There are a few things to keep in mind when using gel stains. First, it is important to prepare the surface of the cabinets properly. This means cleaning the cabinets thoroughly with a degreaser and sanding them lightly to remove any dirt or debris. Once the cabinets are clean and sanded, you can apply the gel stain. Be sure to apply the stain evenly, and use a light touch to avoid applying too much stain.
Once you have applied the gel stain, you will need to allow it to dry completely. The drying time will vary depending on the type of gel stain you use, but most gel stains will dry within a few hours. Once the gel stain is dry, you can apply a clear finish to protect the stain and give the cabinets a glossy or matte finish.
Benefits of Gel Stains
There are several benefits to using gel stains for kitchen cabinets. These benefits include:
- Easy to apply: Gel stains are easy to apply, even for beginners. The thick, gel-like consistency makes it easy to apply the stain evenly, and it also helps to prevent the stain from running or dripping.
- Durable: Gel stains are more durable than traditional oil-based stains, making them a good choice for high-traffic areas like kitchens. The resin base in gel stains helps to protect the stain from scratches and wear.
- Versatile: Gel stains can be used on a variety of surfaces, including wood, metal, and plastic. This makes them a good choice for staining a variety of items, including kitchen cabinets, furniture, and countertops.
How to Apply Gel Stain to Kitchen Cabinets
Applying gel stain to kitchen cabinets is a relatively simple process. Here are the steps:
1. Prepare the surface: Clean the cabinets thoroughly with a degreaser and sand them lightly to remove any dirt or debris. 2. Apply the gel stain: Apply the gel stain evenly to the cabinets using a brush or a sponge. Be sure to use a light touch to avoid applying too much stain. 3. Allow the gel stain to dry: Allow the gel stain to dry completely. The drying time will vary depending on the type of gel stain you use, but most gel stains will dry within a few hours. 4. Apply a clear finish: Once the gel stain is dry, you can apply a clear finish to protect the stain and give the cabinets a glossy or matte finish.Tips for Using Gel Stains
Here are a few tips for using gel stains:
- Test the stain on a small area first: Before you apply the gel stain to the entire cabinet, test it on a small area first. This will help you to ensure that you are happy with the color and the finish.
- Apply the stain in thin coats: Gel stains can be thick, so it is important to apply them in thin coats. This will help to prevent the stain from running or dripping.
- Allow the stain to dry completely: It is important to allow the gel stain to dry completely before applying a clear finish. This will help to ensure that the stain is properly cured and that the finish will adhere properly.

Gel Staining Kitchen Cabinets 6 Month Review Merrypad

Pickled Oak Bathroom Vanity Before And After Gel Stain Staining Cabinets Kitchen Makeover Wood

Java Gel Stain Kitchen Transformation General Finishes Design Center

10 Best Gel Stain Tips For Beginners Budgeting Bliss

Gel Stain Kitchen Cabinets Without Sanding Fast Easy Diy Youtube

How To Gel Stain Cabinets Printable She Buys He Builds

Gel Stain 101 When And How To Use It Bob Vila

How To Use Gel Stain On Cabinets The Good Bad

Gel Staining Kitchen Cabinets For An Easy Thrifty Update

How To Paint Cabinets With Java Gel Stain My Homier Home
See Also


