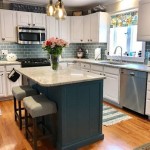
Add Molding To Kitchen Cabinet Doors
Molding can add a decorative touch to your kitchen cabinets and make them look more finished. It's a relatively easy project that can be completed in a few hours, and it doesn't require any special skills or tools. Here's a step-by-step guide on how to add molding to kitchen cabinet doors:
Materials You'll Need
Before you get started, you'll need to gather the following materials:
- Molding of your choice
- Wood glue
- Finish nails
- Hammer or nail gun
- Miter saw
- Clamps
- Sandpaper
- Wood filler
- Paint or stain (optional)
Step-by-Step Instructions
Once you have all of your materials, you can follow these steps to add molding to your kitchen cabinet doors:
- Measure and cut the molding. Measure the length of the cabinet door and cut the molding to fit. If you're using mitered corners, you'll need to cut the molding at a 45-degree angle.
- Apply wood glue to the molding. Apply a thin layer of wood glue to the back of the molding. This will help to hold the molding in place.
- Attach the molding to the cabinet door. Press the molding into place on the cabinet door. Use clamps to hold the molding in place while the glue dries.
- Nail the molding in place. Once the glue has dried, you can nail the molding in place. Use finish nails and a hammer or nail gun.
- Sand the molding. Once the molding is in place, you can sand it to smooth out any rough edges.
- Fill any nail holes. Fill any nail holes with wood filler. Allow the wood filler to dry completely.
- Paint or stain the molding (optional). If you want, you can paint or stain the molding to match your cabinets. Allow the paint or stain to dry completely.
Tips
Here are a few tips to help you get the best results when adding molding to your kitchen cabinet doors:
- Use a sharp miter saw to cut the molding. This will help to ensure that the corners are clean and tight.
- Apply the wood glue evenly to the back of the molding. This will help to create a strong bond between the molding and the cabinet door.
- Use enough clamps to hold the molding in place while the glue dries. This will help to prevent the molding from shifting or moving.
- Nail the molding in place securely. This will help to ensure that the molding stays in place for years to come.
- Sand the molding smooth before painting or staining it. This will help to create a professional-looking finish.
By following these tips, you can add molding to your kitchen cabinet doors and give them a beautiful, finished look.

Adding Molding To Old Cabinets Diy Tutorial Kitchen Cabinet Doors

From Drab To Fab Adding Trim Cabinets

From Drab To Fab Adding Trim Cabinets

Adding Moldings To Your Kitchen Cabinets Remodelando La Casa

Add Moulding To Flat Cabinet Doors Home Kitchens Cabinets Kitchen

Great Way To Add Interest Bathroom Or Kitchen Cabinets Ck This Out Wow Plain Cabinet Doors Home Diy

Easy And Inexpensive Cabinet Updates Adding Trim To Cabinets Drawers The Rozy Home
Easy And Inexpensive Cabinet Updates Adding Trim To Cabinets Drawers The Rozy Home

Add Some Molding And New Fixtures To Update Those Boring Flat Cabinets Kitchen Cabinet Doors Cottage White

Kitchen Diy Shaker Style Cabinets Cherished Bliss


