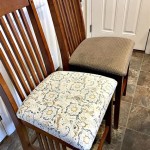
How to Reupholster Kitchen Chairs: A Comprehensive Guide
Reupholstering kitchen chairs is a rewarding and cost-effective way to breathe new life into tired furniture. Over time, chair upholstery can become worn, stained, or simply outdated. Instead of replacing the chairs entirely, reupholstering allows for customization with new fabrics, extending the lifespan of the furniture, and updating the overall aesthetic of the kitchen. This process, while seemingly daunting, can be managed successfully with careful planning, the right tools, and patience. This article provides a detailed guide to reupholstering kitchen chairs, covering everything from preparation to the final touches.
Before embarking on the reupholstering project, it is crucial to assess the condition of the chair frame. Inspect the joints for any signs of weakness or damage. Loose joints should be securely re-glued and clamped until dry. Any structural repairs should be completed before proceeding with the upholstery work. Addressing these issues early will ensure that the reupholstered chair is not only aesthetically pleasing but also structurally sound and durable.
The first step in the reupholstering process is to gather the necessary materials and tools. This includes:
*New upholstery fabric: Choose a durable fabric that is suitable for kitchen use, considering factors like stain resistance and ease of cleaning. Measure the chair seat carefully to determine the amount of fabric needed, adding extra for seam allowances and potential mistakes.
*Staple gun and staples: A heavy-duty staple gun is essential for securing the fabric to the chair frame. Use staples that are the appropriate length for the thickness of the frame.
*Staple remover: This tool is used to remove the old staples from the chair frame. A flathead screwdriver can also be used, but a staple remover is generally more efficient and less likely to damage the wood.
*Pliers: Pliers are useful for removing stubborn staples and for gripping the fabric during the stretching and stapling process.
*Screwdriver: A screwdriver may be needed to remove the chair seat from the frame.
*Scissors or rotary cutter: These tools are used for cutting the new fabric to size.
*Measuring tape: Accurate measurements are crucial for ensuring a proper fit of the new fabric.
*Pencil or marker: Use these tools to mark the new fabric for cutting.
*Batting or foam padding (optional): If the existing padding is worn or compressed, consider replacing it with new batting or foam.
Removing the Old Upholstery
The next step involves carefully removing the existing upholstery. This process provides a template for cutting the new fabric and reveals the underlying structure of the chair seat. Begin by detaching the chair seat from the frame, if applicable. This is typically accomplished by removing screws from underneath the seat. Once the seat is detached, turn it upside down and begin removing the old staples using a staple remover or flathead screwdriver.
Work slowly and methodically to avoid damaging the wood frame. As the staples are removed, carefully peel back the old fabric. Note the order in which the fabric was originally attached, as this will serve as a guide for reattaching the new fabric. Pay attention to any folds, pleats, or gathers in the original upholstery, as these details will need to be replicated in the new upholstery.
Once the old fabric is removed, inspect the underlying foam or batting. If it is compressed, torn, or crumbling, it should be replaced. New foam or batting will provide a more comfortable and supportive seat. Cut the new foam or batting to the same size and shape as the old material. Use the old material as a template for cutting the new material, or measure the chair seat directly.
Carefully remove all remaining staples and any tacks that might be present from the wood. This step can be tedious, but it is essential for creating a smooth and even surface for the new upholstery. Use pliers to grip any stubborn staples and pull them out. Be careful not to scratch or gouge the wood frame. Once all the old materials are removed, the chair seat should be clean and ready for the new upholstery.
Cutting and Attaching the New Fabric
With the old upholstery removed, the next step is to cut the new fabric to size. Lay the old fabric on top of the new fabric, aligning the edges carefully. Use the old fabric as a template to cut the new fabric, adding a few extra inches around the perimeter for seam allowances and stapling. If the old fabric is too damaged to use as a template, measure the chair seat and add the necessary allowances. For a rectangular or square seat, simply measure the length and width, adding several inches to each dimension.
Once the new fabric is cut, position it over the chair seat, centering it carefully. Begin stapling the fabric to the frame, starting at the center of one side and working outward. Pull the fabric taut as it is stapled, ensuring that it is smooth and wrinkle-free. Use the staple gun to secure the fabric to the frame, placing staples every few inches. Work your way around the seat, alternating sides to maintain even tension.
When reaching the corners, the fabric will need to be folded and pleated to create a neat and professional finish. There are several different techniques for folding corners, depending on the shape of the chair seat and the desired look. One common method is to create a box pleat by folding the fabric inward on each side of the corner and then stapling it in place. Another method is to create a mitered corner by folding the fabric diagonally at the corner and then stapling it in place. Experiment with different techniques to find the one that works best for the particular chair seat.
Continue stapling the fabric around the entire perimeter of the chair seat, ensuring that it is taut and secure. Trim any excess fabric with scissors or a rotary cutter, leaving about an inch of fabric beyond the staples. This extra fabric can be folded over and stapled again for added durability and a cleaner appearance.
If new batting or foam was added, ensure it is properly aligned before securing the fabric. The batting or foam should be evenly distributed and free of wrinkles or lumps. Adjust as needed before proceeding with the stapling process. Take your time and make sure the fabric is properly aligned, and smooth to avoid having to pull out staples and redo sections.
Finishing Touches and Reassembly
After the new fabric is securely stapled to the chair seat, the final step is to reattach the seat to the chair frame. Align the seat with the frame and reinsert the screws that were removed earlier. Tighten the screws securely to ensure that the seat is firmly attached to the frame. Inspect the finished chair for any loose staples or imperfections in the upholstery. Use pliers to remove any loose staples and trim any stray threads or fabric edges.
Consider adding decorative trim or embellishments to the chair to further enhance its appearance. Trim can be attached along the edges of the seat using hot glue or upholstery tacks. This can add a touch of elegance and conceal any raw edges of the fabric. Other embellishments, such as buttons or decorative stitching, can also be added to customize the chair.
Once the chair is fully assembled and any finishing touches have been added, clean the upholstery with a soft brush or vacuum cleaner to remove any dust or debris. Avoid using harsh chemicals or abrasive cleaners, as these can damage the fabric. Spot clean any stains or spills immediately to prevent them from setting in. Regularly vacuum or brush the upholstery to keep it looking its best.
Reupholstering kitchen chairs is a manageable project with a significant impact. By following these steps carefully, a tired looking chair can be transformed into a refreshed and stylish addition to the kitchen. The process requires patience, attention to detail, and the correct tools. The resulting piece of furniture is a testament to the effort invested and a customized upgrade to the home.
If at any point in the process, the project feels overwhelming, seeking the assistance of a professional upholsterer is a viable option. Experienced upholsterers possess the skills and tools necessary to tackle complex upholstery projects and can ensure a high-quality, professional finish. However, with careful planning and execution, reupholstering kitchen chairs can be a rewarding and cost-effective DIY project.
Properly maintained, the reupholstered chairs will provide years of comfortable and stylish seating. Selecting quality materials, like durable fabric and supple foam, will ensure the project's longevity. Regular cleaning and care will preserve the appearance and extend the life of the upholstery. By investing the time and effort in reupholstering, homeowners can transform their kitchen space and create a more inviting and comfortable environment.

Reupholstering Vintage Dining Chairs Tiny Sidekick

How To Reupholster Dining Chairs Ofs Maker S Mill

How To Reupholster Dining Or Kitchen Chairs Youtube

How To Reupholster Dining Chairs

How To Reupholster A Dining Chair

How To Re Cover A Dining Chair Build Basic

How To Easily Reupholster Dining Seat Cushions Diy Beautify Creating Beauty At Home

How To Reupholster A Dining Chair Video Tutorial Kim S Upholstery

Reupholster Dining Room Chairs Dissassembly More To Mrs E

How To Reupholster A Chair Seat The No Mess Method Thinking Closet


