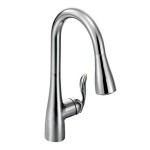
How To Install Kitchen Faucet
The kitchen faucet is one of the most used fixtures in your home. So when it starts to leak or malfunction, it can be a major inconvenience. If you're handy, you can save yourself some money by replacing the faucet yourself. Here's a step-by-step guide on how to do it.
Tools and Materials You'll need
Before you start, gather the tools and materials you'll need. You'll need:
- New kitchen faucet
- Adjustable wrench
- Pliers
- Screwdriver
- Plumber's putty
- Teflon tape
- Bucket
- Rags
Step 1: Turn Off the Water Supply
The first step is to turn off the water supply to your kitchen faucet. There should be two shut-off valves under your sink, one for the hot water and one for the cold water. Turn both valves clockwise to turn off the water.
Step 2: Disconnect the Old Faucet
Once the water supply is turned off, you can disconnect the old faucet. Start by disconnecting the water supply lines. Use an adjustable wrench to loosen the nuts that connect the water supply lines to the faucet. Once the nuts are loose, you can disconnect the water supply lines by hand.
Next, disconnect the drain line. The drain line is the hose that connects the faucet to the drainpipe. To disconnect the drain line, loosen the clamp that holds the drain line in place. Once the clamp is loose, you can pull the drain line off of the faucet.
Finally, unscrew the mounting nuts that hold the faucet in place. The mounting nuts are usually located underneath the sink. Once the mounting nuts are loose, you can lift the faucet out of the sink.
Step 3: Prepare the New Faucet
Before you install the new faucet, you need to prepare it. Start by wrapping the threads of the water supply lines with Teflon tape. This will help to create a watertight seal. Next, apply a bead of plumber's putty around the base of the faucet. This will help to seal the faucet to the sink.
Step 4: Install the New Faucet
Now you can install the new faucet. Start by inserting the faucet into the sinkhole. Then, hand-tighten the mounting nuts. Once the mounting nuts are hand-tight, use an adjustable wrench to tighten them further. Be careful not to overtighten the mounting nuts.
Next, connect the water supply lines to the faucet. Use an adjustable wrench to tighten the nuts that connect the water supply lines to the faucet. Again, be careful not to overtighten the nuts.
Finally, connect the drain line to the faucet. Slide the drain line onto the faucet and tighten the clamp that holds the drain line in place.
Step 5: Turn On the Water Supply
Once the new faucet is installed, you can turn on the water supply. Slowly open the shut-off valves under the sink to turn on the water. Check for leaks around the faucet. If you see any leaks, tighten the nuts or clamps that are causing the leak.
Your new kitchen faucet is now installed and ready to use!

How To Install A Kitchen Faucet Happiness Is Homemade

How To Install A Kitchen Faucet Happiness Is Homemade

How To Replace A Kitchen Faucet

How To Replace A Kitchen Faucet With Single Handle The Home Youtube

How To Install A Faucet Advice From Bob Vila

Installation Instructions For Vienna Single Handle Pull Down Kitchen Faucet With 360 Degree Rotation

How To Install A Kitchen Faucet Happily Ever After Etc

How To Install A Kitchen Faucet Happiness Is Homemade

How To Replace A Kitchen Faucet Planitdiy

How To Install A Kitchen Faucet Lowe S Repair


