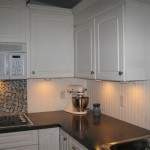
Peel And Stick Kitchen Backsplash
Installing a fresh coat of paint or redecorating your kitchen is a great way to give it a whole new appearance. Changing the backsplash is one simple way to personalize the room and give it a new look. In the past, installing or changing a backsplash was a complicated and difficult task.
It required cutting into the wall, dealing with grout and tile, and hiring a professional to assist with the process. Today’s technology allows you to have the convenience of doing it yourself and the option of being as creative as you want. Unlike traditional backsplashes you needed to handcraft, peel-and-stick backsplashes can be applied to your wall in just a few hours.
The affordable tile panels are manufactured on durable materials such as aluminum or vinyl. These panels are laminated with the beautiful design of your choosing which includes the look of tile, stainless steel, stone, glass or any other customized design you can imagine.
Benefits of Using Peel-And-Stick Backsplash
Peel and stick kitchen backsplash has many advantages. Here are a few of them:
Do-it-yourself Installation: The best feature is that they are incredibly easy to install. You have the option to do it yourself versus hiring an expensive contractor. All you have to do is measure and cut the tiles which are typically 12-by-12 inches and of course, peel off the backing to expose the adhesive. Then firmly press the tile to the wall. You can finish the job in just a few hours.
No Grout Required: The next best part is unlike using large heavy tiles that require a lot of thinset, grout, and even more time to complete the project; you do not need to worry about the mess of grouting the tiles. This makes it so much easier to cut and install the tiles and there is no hassle of cleaning up any mess.
Easy to Clean: The surface of the peel and stick backsplash is nonporous and very easy to clean. All you need to do is wipe it down with a soft cloth and your favorite cleaner and it looks good as new.
Wide Variety of Colors and Designs: These tiles are available in a wide range of colors and designs. You can find the perfect one to match your kitchen's décor. They also come in a variety of finishes, such as glossy, matte, and textured. You can even find peel-and-stick tiles that have the look of real stone, metal, or glass.
Removable: Unlike real tiles, you can easily remove and replace it if needed. So, if you ever get tired of the design or want to update your kitchen, you can simply remove the old tiles and stick on new ones.
Where to Use Peel-And-Stick Backsplash
Peel-and-stick backsplash tiles are suitable for use in a variety of locations, including:
Kitchen: This is the most popular place to use peel-and-stick backsplash tiles. They are a great way to update the look of your kitchen without having to do a major renovation.
Bathroom: Peel-and-stick backsplash tiles are also a good choice for bathrooms. They are easy to clean and can help to create a spa-like atmosphere.
Laundry Room: Laundry rooms are often overlooked when it comes to decorating; however, peel-and-stick backsplash tiles can help to brighten up this space and make it more functional.
Other Areas: Peel-and-stick backsplash tiles can also be used in other areas of your home, such as the living room, dining room, or even the bedroom. They are a great way to add a touch of style to any space.
Tips for Installing Peel-And-Stick Backsplash
Here are a few installation tips:
Clean the Surface: Before you start installing the tiles, make sure the surface is clean and dry. Remove any dirt, dust, or grease.
Measure and Cut: Measure the area where you want to install the tiles and cut them to size. Use a sharp knife or utility knife to make clean cuts.
Peel and Stick: Peel off the backing of the tile and stick the adhesive side to the surface. Press firmly to ensure a good bond.
Overlapping: If you need to overlap the tiles, make sure to do so by at least 1 inch. This will help to prevent water from seeping through the seams.
Use a Sharp Knife: When cutting the tiles, use a sharp knife to make clean cuts. This will help to prevent the tiles from chipping or cracking.
Allow the Adhesive to Cure: Once the tiles are installed, allow the adhesive to cure for at least 24 hours before using the surface.

Pros And Cons Of Peel Stick Backsplash Tile What To Know

Peel And Stick Tile How To Install On A Wall Porch Daydreamer

Diy Peel Stick Tile Backsplash I Spy

How To Add Peel And Stick Tile A Wall Drywall

How To Install Peel And Stick Tile Backsplash On A Wall Angela Marie Made

Exploring The Best Peel And Stick Backsplash For A Farmhouse Kitchen Stickgoo

Peel And Stick Backsplash Tile The Smart Tiles Int

Stik Wall Tile Peel Stick To New Stone Feature Msi

Hexagon Marble Peel Stick Backsplash Tiles Pack Of 4

Art3d 12 X Peel And Stick Kitchen Bathroom Backsplash Wall Tile 1 Pack Walmart Com
See Also


